
To configure the LDAPS , need to import the certificate from the certificate root server . Pls note other than the root certificate it won’t accept other certificate .
Log in to a Domain Controller on the domain.
Click Start, type mmc, and click File > Add/Remove Snap-in.
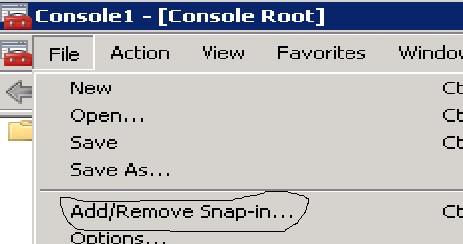
Select Computer account and click Next.

If you are working at the LDAP server requiring the certificate, select Local. Otherwise, select Another computer and click Browse to locate the LDAP server requiring the certificate
When you select the correct computer, click OK > Finish

Click Certificates > Add.

Click on the root certificate
In the console tree, expand Certificates (computer)
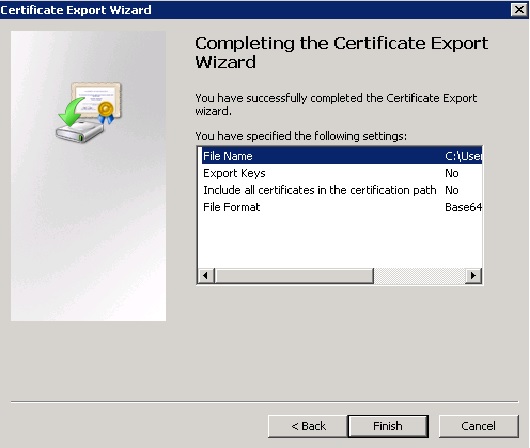
In the certificates console of a computer that contains a certificate that can be used for Server Authentication, right-click the certificate, click All Tasks > Export.

Make sure to select the Server Authentication on the certificate .

On the Export Private Key screen, select No, do not export the private key and click Next.

On the Export File Format screen, select Base-64 encoded X.509 (.CER) and click Next.

On the File to Export screen, choose a name and location to save the certificate.

Click Next and Finish to save the certificate file.
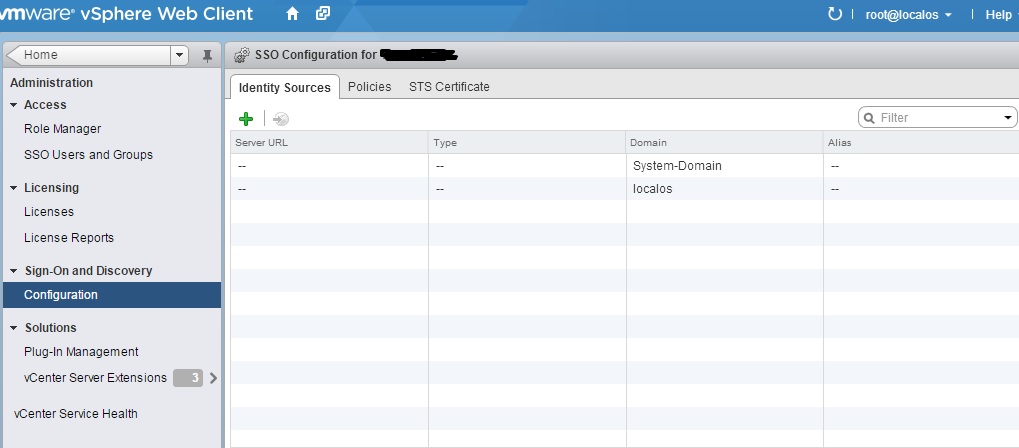
Log in to the vSphere Web Client using an Single Sign On Administrator. The default account is admin@System-Domain.Click Administration and go to the Sign On and Discovery section, click Configuration, then click the green Add Identity Source option at the top.
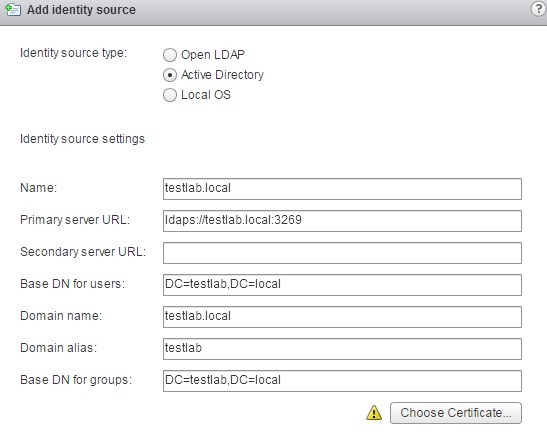
Enter the required information in the Add Identity Source wizard. When completed, click Choose Certificate and browse to the location of the Certificate you saved previously.
You receive a confirmation message when you have imported the certificate successfully. Click OK to close the dialog and OK again to finalize adding the new identity source.


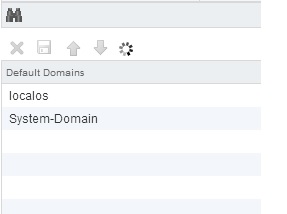
If you want to include this new Identity Source in the Default Domains, select the Identity Source from the list and click Add to Default Domains icon .
Once Identity source is configured with AD as the default domain , login in to the web-client or vsphere client and add the ADD users to the appropriate rights to the VC..
Additional Information Regarding the SSO Identity Source.
We can configure the identity source just for LDAP in the non-secured AD Ladp environment and the default port used is 3268.

A general system error occurred: Authorize Exception error :
In few cases above error will popup when we login using Domain users to connect VC and it will allow only local admin account , it mostly because of SSO Identity source ldap wrong configuration or any change in the AD Ldap end .So check the configuration above to fix the same..


I just would like to add and for those who want* to use SSL (LDAPS): you MUST specify the “Primary server URL” in “Configure identity source” or VCS will still use non-encrypted (simple) bind to the LDAP, revealing your credentials to anyone with a packet sniffer in the very first packet on the network.
Example: Primary server URL: ldaps://yourldapsserver.domain.com:636
*everybody should
Cheers.
LikeLike