
In recent version of windows, Telnet Client is not enabled by default and in this blog we can see various method to install the client and to check the port connectivity.
Option 1 :
we can install it from the Add Roles and Feature.
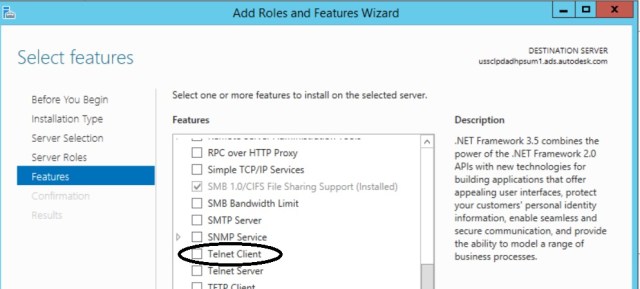
Option 2:
Apart from this tradition way, we can install it using the below Power shell method.
Import-Module ServerManager
Add-WindowsFeature -Name Telnet-Client
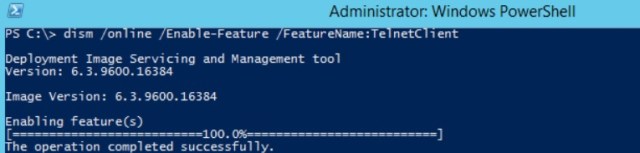
Option 3:
dism /online /Enable-Feature /FeatureName:TelnetClient
Option 4:
Download the below Powershell script and run it on the server.
Option 5:
We can install telnet client using the package manager.
Pls note it will support only Windows Vista & higher.
c:>pkgmgr /iu:”TelnetClient”
Next we can see options to test the port from the source system to destination without using telnet.
Option 1:
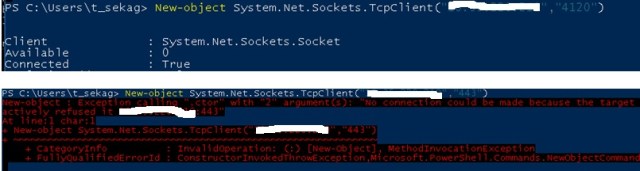
On windows to test the port from the source system to destination we can use alternate method without installing the Telnet client is by Windows Sockets using the System.Net.Sockets provided in .NET framework.
New-object System.Net.Sockets.TcpClient(“IP”,”PORT”)
Option 2:
Use the below powershell script which can do the same operations.
Option 3:
To make it easy we can import this function as cmdlet or module and then use it as the easy powershell cmdlet to test port.
Import-module Test-port.psm1
Type get-help Test-port
syntax Test-port [[-computername] <Object>] [[-port] <Object>]
Test-port -computername 1.1.1.1 -port 80
Download it from the Dropbox and get more info from the readme.
Option 4:
In VMware Vcenter appliance we have to use the CURL to test the port connectivity.
KB2097039 will give more info on the same.
curl -v telnet://127.0.0.1:22
Option 5:
Telnet is available only on ESX hosts. For ESXi 3.5, 4.x and 5.x, you will need to use the netcat (nc).
KB 2020669 will give more info on the same.
nc -z <destination-ip> <destination-port>
Reference :
http://www.travisgan.com/2014/03/use-powershell-to-test-port.html

