
Part-1 blog is about the DSM installation and its function and also Trend DSM 9.6 update
Now in this topic we can see the Trend Micro Deep Security Relay and its function.
Trend Micro Deep Security Relay :
Any Deep Security installation, regardless of whether it is providing Agentless or Agent-based protection, requires at least one Relay-enabled Agent to be installed to download and distribute Security and Software Updates. Any 64-bit Windows or Linux Agent can provide Relay functionality.
Relay Server will be contacting the Trend Micro Security Center to collect the security updates and relaying the information back to the DSM and to Agents and Virtual Appliances. Relay has embedded Agent to provide local protection on the host machine.We can have multiple relays based on our environment in different region which makes agents to reach the near by Relay server for the updates.
As per the Trend below is the recommendation of having the number of Relay Server.
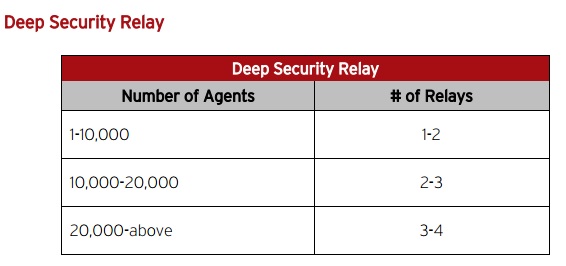
To rollout an update to an endpoint as fast as possible, then more relay servers are required. Increasing the number of relays simply means updates gets pushed out faster to the endpoints.
Example: • To rollout a 10MB update to 20,000 endpoints within 30 minutes, deploy 4 Deep Security Relays. • To rollout a 10MB update to 20,000 endpoints within 1-2 hours, 2 Deep Security Relays are sufficient.
Deep Security Agents and Deep Security Virtual Appliance (DSVA – agentless), get there updates based on the Relay Group we have defined. For Ex if we have some servers to be protected in East Cost and our main DSM server in West Cost , We can have a separate Relay server in East Cost and create the separate Relay group in the DSM for the East Cost and make the DSVA to download the update from the same rather than from the main default DSM.
Installation steps of the DSR.
Build a new VM in the corresponding location and just 2 CPU and 4 GB memory is enough.
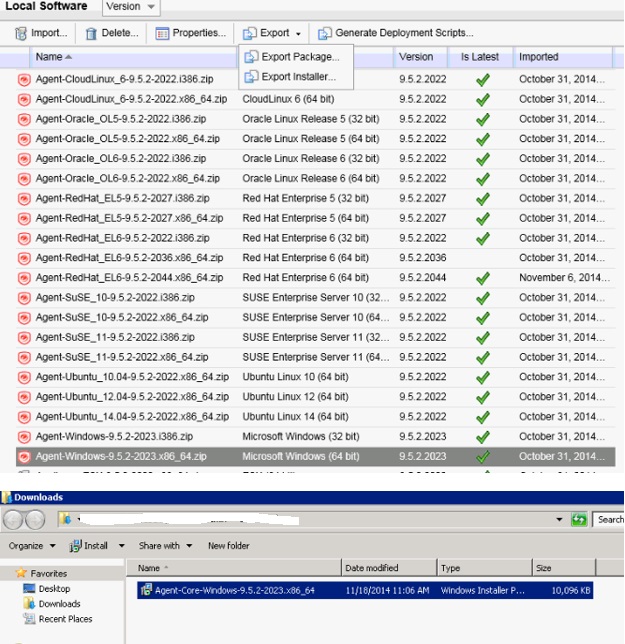
Download the agent from the local software and copy it in the Relay Server.
Click the Exe and continue the Installation .

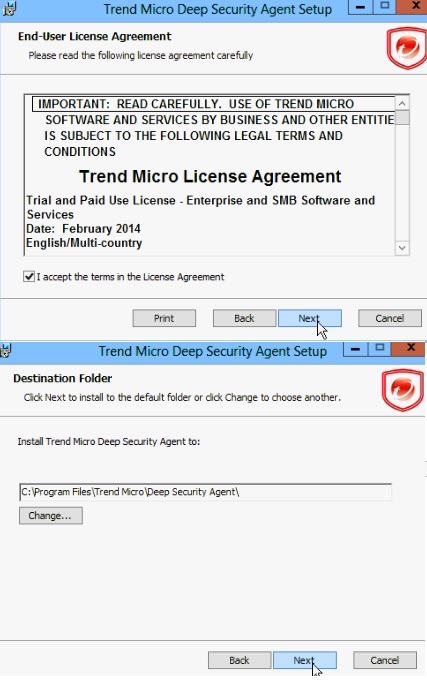
Finish the Installation.

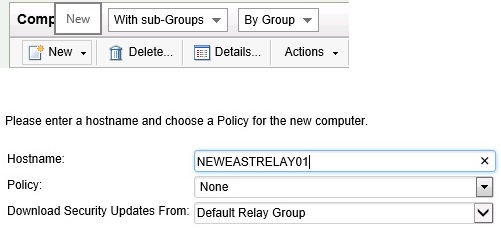
Once the Installation is done then Go to the Computer – New – New Computer and add the New Relay server in DSM.
Activate the server and Enable the Relay .
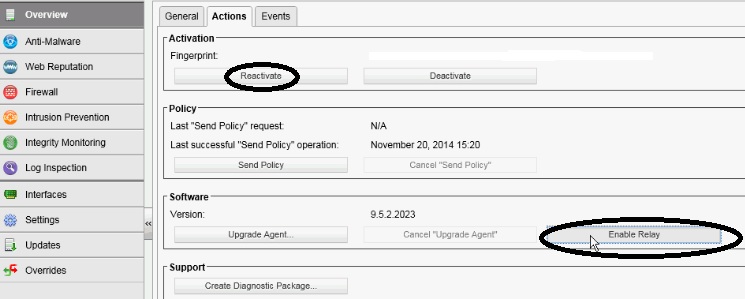
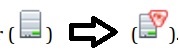
Once its enabled we can see the ordinary computer icon to computer with Relay-enabled Agent and also the number of update components the Relay Module is ready to distribute.
![]()
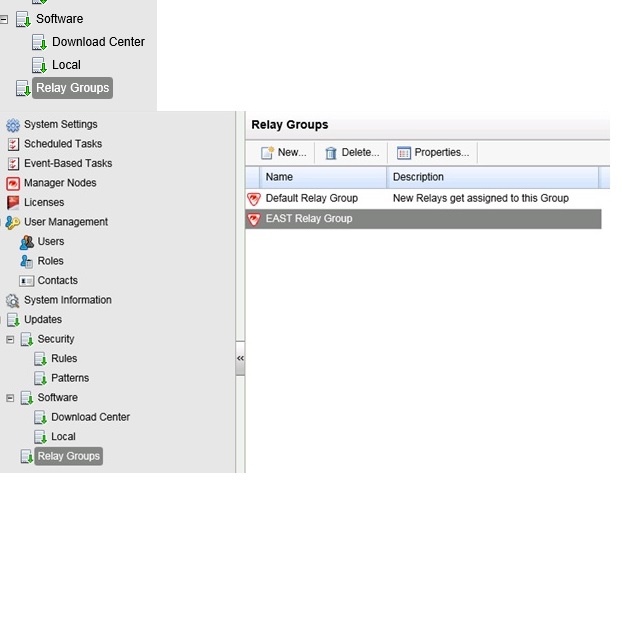
Next go to the Administration and Relay Group and create the New Relay Group to the East cost location.
Configuration of the Relay Server is completed and we need to point the Relay Server to the corresponding VMs in the policy .

Pls check the next blog for the vShield Endpoint configuration.


Pingback: Trend Micro Deep Security 9.5 ( vShield Endpoint ) – Part 3 | Techbrainblog
Pingback: Trend Micro Deep Security 9.5 -Part 1 | Techbrainblog
Pingback: Trend Micro Deep Security 9.5 ( Filter Driver Installation ) – Part 4 | Techbrainblog
Pingback: Trend Micro Deep Security 9.5 ( Deep Security Virtual Appliance-DSVA) – Part 4 | Techbrainblog
Pingback: Trend Micro Deep Security 9.5 ( Deep Security Agent ) – Part 6 | Techbrainblog
Pingback: Trend Micro Deep Security 9.5 ( Smart Scanning Protection Server – SSP Server) – Part 7 | Techbrainblog