Repointing the VMware vCenter Server 6.0 to the external PSC.

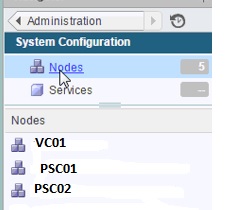
I was trying to repoint the vCenter ( vCSA 6.1 U1 ) using  vmafd-cli from the PSC01 ( External PSC ) to another PSC02 ( External PSC ) which is configured as the replication partner to the PSC01  and our setup is two PSC’s connected with same domain within the same site.

/usr/lib/vmware-vmafd/bin/vmafd-cli set-dc-name –server-name localhost –dc-namesystemname_of_second_PSC

It was  successfully repointed only when PSC01 is live and online and it fails  when the PSC01 is down with the error while starting the inventory service ..

Stdout = Starting VMware Inventory Service…

Waiting for VMware Inventory Service…………………………………………………………………………
WARNING: VMware Inventory Service may have failed to start.

Stderr =
2015-09-23T18:07:58.521Z {
“resolution”: null,
“detail”: [
{
“args”: [
“Command: [‘/sbin/service’, u’vmware-invsvc’, ‘start’]\nStderr: ”
],
“id”: “install.ciscommon.command.errinvoke”,
“localized”: “An error occurred while invoking external command : ‘Command: [‘/sbin/service’, u’vmware-invsvc’, ‘start’]\nStderr: ‘”,
“translatable”: “An error occurred while invoking external command : ‘%(0)s’”
}
],
“componentKey”: null,
“problemId”: null
}
ERROR:root:Unable to start service vmware-invsvc, Exception: {
“resolution”: null,
“detail”: [
{
“args”: [
“vmware-invsvc”
],
“id”: “install.ciscommon.service.failstart”,
“localized”: “An error occurred while starting service ‘vmware-invsvc’”,
“translatable”: “An error occurred while starting service ‘%(0)s’”
}
],
“componentKey”: null,
“problemId”: null
}
Unable to start service vmware-invsvc, Exception: {
“resolution”: null,
“detail”: [
{
“args”: [
“vmware-invsvc”
],
“id”: “install.ciscommon.service.failstart”,
“localized”: “An error occurred while starting service ‘vmware-invsvc’”,
“translatable”: “An error occurred while starting service ‘%(0)s’”
}
],
“componentKey”: null,
“problemId”: null
}

But at the same time in another different environment it was successfully re-pointing the VC from one PSC01 to PSC02 without any issue even the PSC01 is down.

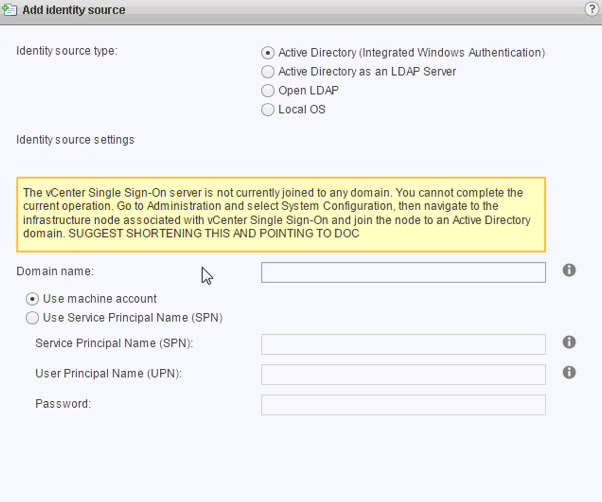
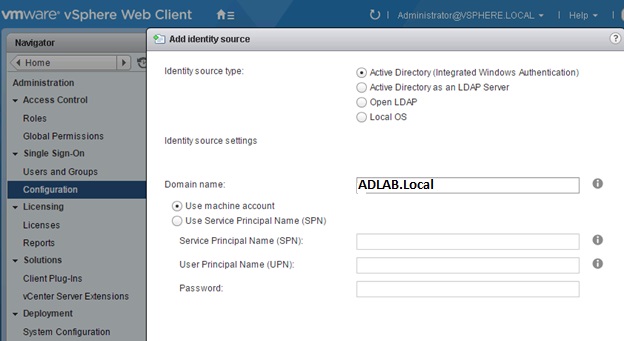
I was searching the KB articles and also raised the ticket with VMware but they mentioned the inventory service is failing because of certificate issue , in my case it is fresh installation and really couldn’t find the exact cause for the issue.

At the right time the below blog got released mentioning in 6.1 release there are few enhancements in the re-pointing with few rules.

https://blogs.vmware.com/vsphere/2015/10/reconfiguring-and-repointing-deployment-models-in-vcenter-server-6-0-update-1.html#comment-489158

So they introduced an update on cmsso-util with two rules.

Reconfiguration Requirements

  • The vCenter Server instance must be an embedded deployment model.
  • The target Platform Services Controller must be a replication partner of the existing embedded Platform Services Controller in the same SSO Domain.

Note: In vCenter Server 6.0 Update 1, we only support a single transition from embedded deployment to a external deployment (MxN) model for per SSO domain. See the Known Issues section of the Release Notes for additional details.

 Repointing Requirements

  • The vCenter Server instance must be an external deployment model.
  • The target Platform Services Controller must be a replication partner of the existing external Platform Services Controller in the same SSO Domain.

cmsso-util repoint –repoint-psc “PSC2.vsphere.local”

Pls check the blog for more steps and instructions to run the  cmsso-util and by downloading the updated cmsso from KB 2131191 , it resolved my issue.

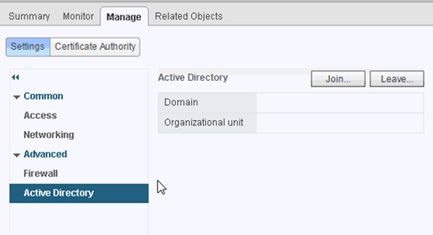
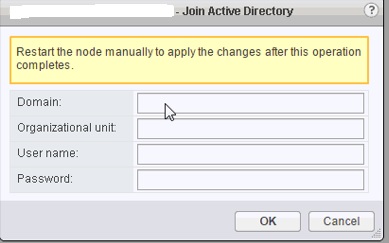
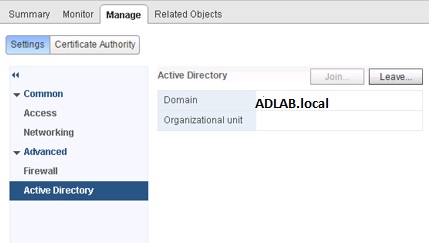
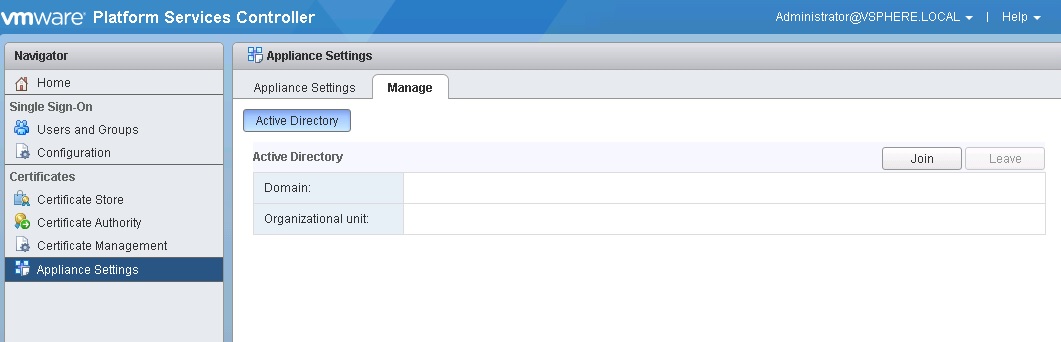
I want to share here is to repoint or reconfigure the VC from one external PSC to another external PSC , it should be configured as the replication partner and anything which is standalone or fresh external PSC then  it wont work.As per VMware we need to do manual changes to do the same and no document is available.

ewd

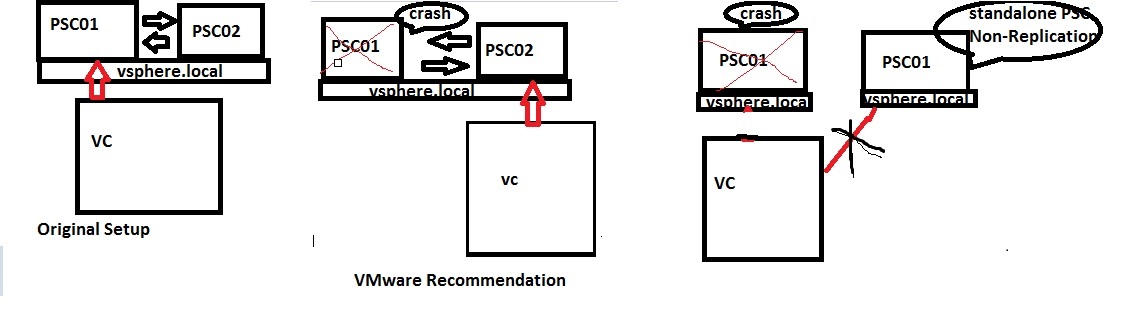
Also as per the blog we can also repoint the external PSC from one site to another site and in my testing that only be possible when the active PSC is online because we need to do two steps to re-point the VC from one site external PSC to another site external PSC.

1 .  cmsso-util repoint

2. cmsso-util move-services

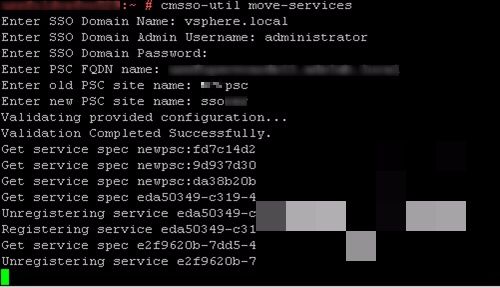
Move services will work only when the active PSC is up and running , if you try to run when it is crash or down then it will fail with the below error.

Untitleedd

In-case just re-point the PSC without the move then it will show the information as below.

ted

Below is the pic of move command when it runs with active PSC is running on the source site.

111Untitled_censored

I have written the powershell script to do the re-point process and download the same from the blog.

Also pls check the below link to automate the re-point using the script

http://www.virtuallyghetto.com/2015/12/how-to-automatically-repoint-failover-vcsa-to-another-replicated-platform-services-controller-psc.html

Reference :

https://blogs.vmware.com/vsphere/2015/10/reconfiguring-and-repointing-deployment-models-in-vcenter-server-6-0-update-1.html#comment-489158

http://pubs.vmware.com/vsphere-60/index.jsp?topic=%2Fcom.vmware.vsphere.upgrade.doc%2FGUID-07D2C988-67A5-4FE2-A276-8B99E4909370.html&resultof=%22repoint%22%20

http://kb.vmware.com/selfservice/microsites/search.do?language=en_US&cmd=displayKC&externalId=2113917

http://kb.vmware.com/selfservice/search.do?cmd=displayKC&docType=kc&docTypeID=DT_KB_1_1&externalId=2131191

http://kb.vmware.com/selfservice/microsites/search.do?language=en_US&cmd=displayKC&externalId=2113917

Posted in Platform Services Controller (PSC ), Vcenter Appliance, vCSA 6.0, VMware | Tagged , , , , | Leave a comment

Trend Micro Deep Security Manager 9.6 Upgrade ( 9.5 SP1 – 9.6 ) – Part 1

Pls check my other blogs for the Trend Deep Security 9.5 configuration and its features and also Trend DSM 9.6 SP1 with windows 10 support.

Trend has released the new version 9.6 and now we will see the upgrade steps from the 9.5 SP1 DSM version to 9.6.Also pls make sure to take the latest DB back before starting the activity .

Download the latest version from the download center link

Click the 9.6.1589.X64.exe from the download folder.

Trend19.6

Select the language

Trend29.6

Click Next from the welcome page.

Trend39.6

Accept the agreement.

Trended

It will stop the DSM service and start extracting the files.

Trendeed

Installation will check for the previous version of DSM

tretled

Once it find the older version , it will show the version which is going to be installed and also asks option to upgrade or change.

Select the Upgrade option.

trenddd

It will show the warning pointing that it will make some changes in database and also recommends to do the DB back.

When you upgrade DSM, the schema of all the tenants database (DB) will be updated as well. It may take a very long time to upgrade when the customer has multiple tenants with separate databases.

As a workaround, Trend  SEG has developed an upgrade script that you can run manually for each tenant prior to the actual patch upgrade.

Pls check the link : http://esupport.trendmicro.com/solution/en-US/1112218.aspx

trendded

Select to proceed with upgrade option.


trnd1d

It will un-install the previous version.

ternd1d

Installation will extract files.

rtitled


Untid3d

It will update the Database Schema.

32d

It will start the DSM

trnddd

Unttrndd

Installation will be finished when the DSM service is up

Urted

webdd

Multi-Manager configuration it will show the warning and recommend to do the same upgrade on other manager server also.

trende1d

abouttrnd


Posted in Trend Micro Deep Security | Tagged , , , , , | 7 Comments

How to configure the NTP on the vCenter Server Appliance 6.0 – vCSA

We have various methods to configure and verify the NTP settings in PSC\VC and during the installation itself we have to point the correct NTP setup and if we want to change or update the configuration then pls follow the below methods.

Method : 1

Login to the web link https:\\psc:5480 and from the Time configuration we can set the NTP server .

r4ed

Method :2

Open the console session and press ALT + F1 or login to the putty session.

From the Bash shell –  Login as Root user.

ntp.get

For example:
Config:
Status: Down
It will show the status as down if no NTP is configured.

Run this command to enable the NTP server:

ntp.server.add –servers ntp_servername

To remove an NTP server, run this command

ntp.server.delete –-servers ntp_servername

To override any current servers.

 ntp.server.set 

Once the NTP Server is set and active , it will show the below status in ntp.get.


233itled

Run this command to enable the NTP mode.

timesync.set –mode NTP


Method : 3

Login in to the Application Shell.

First check the status of the NTP Server by running the below command

   ntpq -p

Check the NTP service Status.

service ntp status

To configure the NTP Server by login to the below ntp.conf.

vi /etc/ntp.conf

Pls note you have to use one server below another and don’t use commas.

 Server 1.NTP.Server

Server  2.NTP.Server

Once done then stop and start the NTP service.

 service ntp stop\start.

 Again to verify the entry in the conf.

cat /etc/ntp.conf

ntpq –p

So the * shows the active NTP Server and make sure the reach shows 377

321led

Run the command to verify that you successfully applied the NTP synchronization.

Logout and from the shell run this command to enable the NTP server:

timesync.set –mode NTP

timesync.get The command returns that the time synchronization is in NTP mode or host mode.

If the NTP sync was pointed to host then it will show the Mode as Host and same for the NTP server as mode NTP.

245ed


Reference :

Click to access vsphere-esxi-vcenter-server-60-appliance-configuration-guide.pdf

http://kb.vmware.com/selfservice/microsites/search.do?language=en_US&cmd=displayKC&externalId=2113610

Click to access VMware-vsphere-60-vcenter-server-appliance-55-60-comparison.pdf

Posted in vCSA 6.0, VMware | Tagged , , | 2 Comments

vCSA 6.0 Installation issues – ” Firstboot script execution error “

Pls check my previous blogs on various issues faced during the installation and here I just added few other issues which we faced in our new environment. I hope these somehow shed some lights to fix the installation issues.

vCSA 6.0 “Firstboot Script Execution Error – Failed to run vdcpromo”

VMware vCenter Server Appliance 6.0 – “Failed to Start Services. Firstboot Error”

Invalid Credentials – Join an SSO domain in an existing vCenter 6.0 platform service controller.

vmware-kb-articles-with-no-resolution-for-few-known-issues-in-vsphere-6-0-and-workaround-to-fix

Issue No : 1

When I was trying to install the vCenter which connects to the external PSC , I forgot to provide the FQDN of the PSC and the Installation got failed with the below error.

To fix the below issue , during installation make sure to provide the proper IP or FQDN of the PSC.

wUn23led

Issue No : 2

Below error occurs when we re-installing the VC – “ ERROR_TOO_MANY_NAMES”

To fix this issue we need to decommission the old VC properly before starting the reinstallation of the VC. Pls check my other blog on decommission of the PSC\VC.

Pls check this blog for more info : Issues and Errors when decommissioning the vCenter Server or a Platform Services Controller -vCSA -6.0

3itled

Issue No :3

Once the OVF is downloaded and starting the installation it got failed with the below error and at the same time you will notice the message in the vCenter which we selected to host the vSCA “ This task was cancelled by the user”

I have downloaded the fresh ISO and tried the installation but again it got failed but at the same it went successfully  using the same ISO from my laptop and further investigation I noticed from the installation server I couldn’t ping the ESX hosts on the vCenter which I selected for the appliance and also several other ports are blocked.

To fix the issue , try whether able to ping the ESX hosts and telnet other basic ports like 443 from the installation server to the ESX host which selected for the installation.

ietledUn23led

Issue No:4

DNS with proper FQDN and IP have to be created prior to the VCSA deployment or it will fail with the error”Firstboot Script Execution Error – The Supplied System Name is not Valid”.

If DNS is properly configured and Nslookup is working fine then simply try installation again it will work.

ieftled

Issue No 5:

Below Error will occur if the Time sync is not properly configured , especially when selected the host for the Time sync. – ” Detected System Clock skew between this node and vCenter SSO  – Ensure that system clock on this node is synchronized with vCenter Single Sign-on.

rtled

ESX Host Time configuration

gtitled

To fix this issue make sure the Time NTP Server is configured correctly and its running status in the ESX hosts.

When installing the client plugin it hangs on installation while installing the certificate and starting service .

Issue No 6:

67ed

As per VMware KB 2133846

http://kb.vmware.com/selfservice/microsites/search.do?language=en_US&cmd=displayKC&externalId=2133846

This is a known issue affecting the Client Integration Plug-in Update 1.

Currently, there is no resolution.

To work around this issue, allow for up to 20 minutes, depending on your workstations processor power, to install the latest version of the Client Integration Plug-in 6.0 Update 1.

Issue NO 7:

Client integration plugin was already installed but still it just asks to refresh the page and it will be blank with out Install and Upgrade option.

w2d

I cleared the cache , Installed the Firefox and rebooted the server also but no luck.

To fix this issue try the below option which worked for few when i searched in internet but for me again I copied the ISO and started the installation.

  • On any Windows OS, if vcsa-setup.html is refreshed on Firefox browser, a blank banner message might appear after allowing the Client Integration Plugin to run
    Refreshing the vcsa-setup.html file might result in a blank banner on top in the Firefox browser. This is an intermittent issue. The blank banner appears after allowing the Client Integration Plugin to run on the browser. For example, allowing the vmware-csd process to run on Firefox.Workaround: While allowing vmware-csd process to run on Firefox for the first time, select the Remember my Choice option for vmware-csd links and refresh the vcsa-setup.html file. This should prevent the blank banner on refresh of the vcsa-setup.html file.
    Alternatively, close Firefox browser and reopen vcsa-setup.html.
  • The Install and Upgrade buttons might not appear in the vCenter Server Appliance installer if you run it in Mozilla Firefox on a Windows 2008 Server OS, if the proxy settings are not configured properly
    After you install the Client Integration Plug-in and open vcsa-setup.html in Mozilla Firefox on a Windows 2008 Server OS, you must allow the Client Support Daemon plug-in to run. After you select vmware-csd and click OK, the Install and Upgrade buttons might still not appear. The countdown for detecting the Client Integration Plug-in goes down to zero but nothing happens. This issue is related to the browser proxy settings.Workaround: Fix the Mozilla Firefox proxy settings:

    1. Navigate to the Firefox Options menu.
    2. Click Advanced, and click the Network tab.
    3. Click Settings.
    4. If Use system proxy settings is selected, click the Auto-detect proxy settings for this network radio button. If the Use manual proxy configuration is selected, set the proxy server for your network.

https://www.vmware.com/support/vsphere6/doc/vsphere-esxi-vcenter-server-60-release-notes.html

Issue No 8:

During the installation,  NTP server which we provided is wrong then the installation will fail with the error ” Failed to set the time via NTP : Internal Error . Code :1 “

Make sure the NTP Server IP is valid and also it is reachable.

Uewbd

Issue No 9 :

While installing the VC it failed in the final stage and when we try re-installing it with the same name it was showing the error ” ERROr 23,Join vmdir failed “

Ured

Link mentioned in the KB 2117378 , clean the old stale VC record from the PSC.

If the vdcleavefed command fails then reboot the appropriate PSC , it will fix the issue.

Issue No 10 :

If we try to install the VCSA 6.0 on older version of ESXi 4.0\4.1 , it will fail with the below error.

web

It will only support from the version ESX 5.0

Posted in vCSA 6.0, VMware | Tagged , , , , | 3 Comments

Issues and Errors when decommissioning the vCenter Server or a Platform Services Controller -vCSA -6.0

Platform Service Controller ( PSC ) \ vCenter which connects to the external PSC and if it no longer required or not working then we can decommission or delete the appliance.

First step is to stop and power-down the PSC which no longer needed and also make sure to re-point the VC to the other PSC in the environment.

  1. Login to the PSC SSH as root
  2. Enable the Shell
  3. run the cmsso-util unregister command

CMSSO will unregister the PSC\VC from the corresponding nodes.

cmsso-util unregister –node-pnid Platform-Services-Controller-System-Name –username administrator@your_domain_name –passwd vCenter-Single-Sign-On-password

Platform-Services-Controller-System-Name is the FQDN or IP address of the Platform Services Controller that you want to decommission.

67led

cmsso-util command may fail when removing a node with the error:

Could not find a host id which maps Hostname to in Component Manager Failed!!!

erd

If this occurs, run this command:

vdcleavefed is used to completely remove all the information related to the PSC\VC

/usr/lib/vmware-vmdir/bin/vdcleavefed -h -u [-w ]

vdcleavefed -h decommpsc.testlab.local -u Administrator -w Passw0rd!

Upon successful execution, you see output similar to:

/usr/lib/vmware-vmdir/bin/vdcleavefed -h psc4.vclouud.local -u administrator
password:
vdcleavefd offline for server psc4.vcloud.local
Leave federation cleanup done


If the PSC or vCenter Server node is still active, you see the below error. Shut down the vCenter Server or PSC before execution.

/usr/lib/vmware-vmdir/bin/vdcleavefed -h psc4.vcloud.local -u administrator@vsphere.local
password:
vdcleavefd offline for server psc4.vcloud.local
“Leave federation cleanup failed. Error[1] – Operations error”

pscd

If the FQDN is wrong or sometime it wont take the IP and it will show the error as

“Leave federation cleanup failed. Error[13] – Confidentiality required.”

g2ed

So make sure to give the correct FQDN name of the PSC.In case FQDN and IP is right and still if it shows the error then check the logs from the location /storage/log/vmware/vmdir/vdcleavefed.log and look for any ladap connectivity errors , mostly it is because of mis-match certificate and we need to provide the correct certificate to the PSC\VC.

One easy way to fix the issue is by re-deploying the PSC again with the same name , just rename the old PSC and re-install the new PSC with the same FQDN  name and try to decommission.

If the user name or password is wrong then it will show the error as

” Error (9234) – User invalid credential “

Just administrator is enough for the username.

7tled

Once everything is corrected then the result will be ” Leave Fedration cleanup done “

opoitled

We can verify the vCenter whether it is removed completely or still the entry is present by running the below command and search for the Service ID: 

/usr/lib/vmidentity/tools/scripts/lstool.py list –url http://localhost:7080/lookupservice/sdk –type vcenterserver > /tmp/vc.txt

Reference :

http://kb.vmware.com/selfservice/microsites/search.do?language=en_US&cmd=displayKC&externalId=2114233

http://kb.vmware.com/selfservice/microsites/search.do?language=en_US&cmd=displayKC&externalId=2106736

Posted in vCSA 6.0, VMware | Tagged , , , | 4 Comments

Invalid Credentials – Join an SSO domain in an existing vCenter 6.0 platform service controller.

VC6.0 Appliance Installation Issue.

We already created one primary platform service controller ( PSC ) and when trying to install the second PSC\VC which connects to the primary PSC, it is failing with the error “ invalid credentials “ and the installation  couldn’t accept to join the primary PSC domain. we tried to install by clearing the cache and also with different browser from the same local windows jump box server which primary PSC installed, even rebooted the server but still failed with the same invalid credentials error.

We started checking the basic configuration like DNS forward and reverse lookup which was working fine and then the most interesting part is when we trying to connect to another different PSC which is located in different site, it accepts the credentials without any issue.

PSCed

At last installation went successfully when doing it from my laptop , it accepts the credentials without any issue and the installation got completed .Mostly the issue is because of the port issue For EX , from my laptop I was able to telnet port 636 to the primary PSC  but from the jump box server in which the installation is failed the port was blocked.I am not very sure about which port have to be enabled but it is good to have the ports recommended  on the below KB.

In few other cases first check whether the primary PSC node is pinging and reachable because if it is unavailable also it will show the error as invalid credentials and also try by restarting all the service from the primary PSC node using service_control –stop\start.

http://kb.vmware.com/selfservice/microsites/search.do?language=en_US&cmd=displayKC&externalId=2106283

Posted in vCSA 6.0, VMware | Tagged , , , , | 1 Comment

vCSA 6.0 “Firstboot Script Execution Error – Failed to run vdcpromo”

Platform Service controller – PSC installation was failing when we try to connect to join the PSC in the same domain name but with different site name.

” Failed to run vdcpromo “

errod

We have one PSC installed in the East Cost with the VSPHERE.LOCAL domain name and EAST as the Site name and we are trying to install another PSC in West Cost to join with the East Cost PSC in the same domain ( VSPHERE.LOCAL ) but with different site name West. At the finale stage of the installation it got failed with the below error ” Failed to run vdcpromo

After investigating the basic logs , we realize it is because of some port issue and  by having some help from the blog we opened the basic ports 80,443,514,1514,7444 but still the instillation was failing . At last with the help of the below KB we opened the additional ports 636 , 2012,2014,2020,11711 and 11712 which resolved the issue.

For EX if we download the logs ( Pls check the my other blog on searching the key word from the VMware log ), open the  vmafd-firstboot_***_stderr.log and we can find the error ” Vdcpromo failed. Error 382312513: Failed to connect to the remote host, reason = rpc_s_connect_timed_out (0x16c9a041) ” which  mean  port 2014 for RPC port is not opened between the sites.

Port 636 and 2014 is important for the Enhanced Linked Mode.

1portd


Pls check my other blog for additional PSC\VC installation issue.

VMware vCenter Server Appliance 6.0 – “Failed to Start Services. Firstboot Error”.

Reference : http://kb.vmware.com/selfservice/microsites/search.do?language=en_US&cmd=displayKC&externalId=2106283

Posted in vCSA 6.0, VMware | Tagged , , , , , | 3 Comments

Replacing vCenter 6.0 SSL Certificate.

To generate the certificate we need to have Microsoft Certificate Authority server with the vSphere 6.0 Template for SSL Certificate.Pls check my other blog on creating the new template for vSphere 6.0.

update 04\02\2016

Before proceeding to change the certificate, make sure to update the VC\PSC to the latest update from the VMware ( VCSA U1b or U2 ) and check my other blog for the bug details in the older version and also i have pointed below the changes we can notice while doing it using the latest code.

Generate the Certificate Signing Request

In vSphere 6.0 and later, the VMware Certificate Authority (VMCA) provisions your environment with certificates. This includes machine SSL certificates for secure connections, solution user certificates for authentication to vCenter Single Sign-On, and certificates for ESXi hosts that are added to vCenter Server.

In this blog we can see how to generate the Machine SSL Certificate .

Machine SSL Certificates

The machine SSL certificate for each node is used to create an SSL socket on the server side to which SSL clients connect. The certificate is used for server verification and for secure communication such as HTTPS or LDAPS.

All services communicate through the reverse proxy. For compatibility, services that were available in earlier versions of vSphere also use specific ports. For example, the vpxd service uses the MACHINE_SSL_CERT to expose its endpoint.

Every node (embedded deployment, management node, or Platform Services Controller), has its own machine SSL certificate. All services that are running on that node use this machine SSL certificate to expose their SSL endpoints.

The machine SSL certificate is used as follows:

By the reverse proxy service on each Platform Services Controller node. SSL connections to individual vCenter services always go to the reverse proxy. Traffic does not go to the services themselves.
By the vCenter service (vpxd) on management nodes and embedded nodes.
By the VMware Directory Service (vmdir) on infrastructure nodes and embedded nodes.

VMware products use standard X.509 version 3 (X.509v3) certificates to encrypt session information that is sent over SSL between components.

To generate the certificate we need Microsoft Certificate Authority server with the vSphere 6.0 Template for SSL Certificate.

First create the folder under root on both PSC and VC appliance – /root/cerssl .

Pls check the blog to transfer the file using the Winscp .

Generate the Certificate Signing Request

First we need to generate the CSR ( Certificate  Signing Request ) for the Machine SSL which we get when we open the vSphere Web Client in a web browser.

Run the below command to Generate the CSR in PSC first.

 /usr/lib/vmware-vmca/bin/certificate-manager

 Run the utility and Select the Option 1

Provide the SSO Password

1itled

123d

23led

update 04\02\2016

In VCSA U1b update VMware added the below option to provide more details as per our environment.

newcert

Once CSR is generated then exit by option 2.

etled

Now login to the VC and do the same steps , only extra step is it will ask to provide the PSC IP address .

1etled

Once PSC IP is provided then generate the CSR by using the option 1

2wed

Exit the Certificate Manager by option 2.

Next step is to move the Machine CSR to the local machine by using the Winscp.

Unt90ed

Next step is to login to the internal certificate issuing server.

On the browser type the https://localhost/certsrv/

Click on Request a Certificate.

cfed

Click advanced certificate request

21tled

Click the below option Submit a certificate by using the 64-encoded.

3ed

Open the CSR file which downloaded using Winscp and copy the clipboard.

Paste it on the below option Base-64-encoded certificate request.

11Untitled_censored (1)

 Next Select the Certificate Template which we created before vSphere 6.0.

11Untitled_censored (2)

Next select the Base 64 encoded.

Click Download Certificate.

0led

 Rename the file to the appropriate node name.

Next Download the Download Certificate chain.

CERT.P7b

Open the Certificate chain and if we have the subordinate CA then we need to select both CA and Subordinate CA

First right click the Primary CA – All Tasks – Export.

Un0led

Click Next

23itled

Click Base-64 encoded X.509 (.cer)

Unt23ed233led

save the file as rootca.cer

Once done next again open the same chain file and select the subordinate CA .and export the same and save it as subca.cer.

Note:If we have only one CA then no need to do these steps.

Rename the rootca.cer and subca.cer to text file.

Create the new file called root64.txt.

0oled

Open the rootca.txt , Copy the content and pate it in the root64.txt.

Now open the subb.txt , Copy the content and pate it in the root64.txt below the rootca content.

00tled

Make sure there is no space left in the txt between rootca and subb content.

Now change the root64.txt to root64.cer

909tled

Do the same steps to other PSC and also for the VC.

After successfully saving and exporting the root-64.cer file, it’s time to upload it to PSC\vCenter. Here I’ll use WinSCP again to copy the machine_ssl.cer and root-64.cer file.

32tled

Replace the existing certificate with the newly generated certificate

Login to the PSC.

Now that the files have been copied, open up the Certificate Manager Utility and select Option 1, Replace Machine SSL certificate with Custom Certificate. Provide the password to your administrator@vsphere.local account and select Option 2, “Import Custom Certificate(s) and key(s) to replace existing Machine SSL certificate” You will be prompted for following files:

machine_ssl.cer , machine_ssl.key ,root-64.cer

232tled

Import Custom Certificates via Certificate Manager Utility

Select “Y” to continue the operation. This may take a few minutes, depending on how your systems are configured.

e2tled

e2tl2ed

update 04\02\2016

In VCSA U1b update VMware added the below option to provide more details as per our environment.

new1cert

ced

Once the service status 100% completed then make sure to reboot the service on VC using “service-control –start –all” “ service-control -–stop –all”

After all the services are restarted then do the same steps to import the certificate using Certificate Manager Utility. 

90tl1ed

90tled

Verify the certificate by login to the we console of the VC https:\\FQDNVC:9443 .

Also check this blog for options to check and alert the vcenter certificate expiration.

Posted in Certificate, High-Availability, vCSA 6.0, VMware | Tagged , , , | 4 Comments

Creating a new Template for vSphere 6.0 to use for Machine SSL and Solution User certificate.

Pls check my previous blogs about the PSC , F5 PSC LB, vCSA installation and PSC AD configuration.

Login to the windows CA issuing server and type certtmpl.msc which starts up the Certificate Templates Console.

Go to the Templates folder , right click and select Manage.

Look for the “Web Server” template , right click and duplicate it.

certd

Make sure to select the proper template version according to the environment.

If you have an encryption level higher than SHA1, select Windows Server 2008 Enterprise.

eed

Click on the General tab and name it “vsphere 6.0”

ged

Click the Extensions tab.

Select Application Policies and click Edit.

Select Server Authentication and click Remove, then OK.

titlegd

tl9ed

Next Select Usage, then click on Edit. Check the Signature is proof of origin (nonrepudiation) option. Leave all other options as default.Click Ok

r3d

Click the Subject Name tab

Ensure that the Supply in the request option is selected.

Unti4tled

Run – MMC – Add certificate Authority – Right Click – certificate Templates – Find the vSphere 6.0 VMCA template and select it. Click OK.

7ed

1e4d

Once done you can see the new template in the certificate web console.

1e43d

Posted in Certificate, High-Availability, vCSA 6.0, VMware, Windows | Tagged , , | Leave a comment

Joining a Platform Service Controller to the AD Domain (vCSA 6.0)

Pls check my previous blog on PSC , F5 PSC LB and vCSA installation and configuration.In this blog we can see the PSC AD configuration.

In vCSA 6.0 the way we connect the AD is changed when compare to the older version. To join the AD in 6.0 VMware  included the Infrastructure node configuration which is part of the Platform Service controller.

When we have more that one PSC in the Load Balacer configuration then we have to configure the AD in all the PSC so that if active PSC is down still we can login to the other PSC.

Before configuring the AD make sure the Time Synchronization and naming  is correct between the PSC and AD.

Login to the Web-Client with SSO Username and Password.

Navigate to Administration – Deployment – System Configuration.

l2ed 9itled

Select the Platform Service Controller and go to Manage –
Active Directory.

Click join

e45d9d


0ed

Once the authentication is provided then make sure to reboot the PSC and when booted we can see the AD configuration.

01ed

Make the same changes to the other PSC node also and in case if we are having issue on adding AD to the PSC and getting the below error then we need to activate the agent directly by login in to the PSC.

56ed

-ed

Login to the PSC SSH : /opt/likewise/bin/domainjoin-cli join domain username

Provide the AD password to join the domain.

Once it shows SUCCESS then reboot the PSC node.

Note it wont show the domain in GUI AD option like other PSC but still it is authenticated with the AD domain.

Another way to add the Domain is to by login to the Https://FQDNPSC/PSC

Provide the administrator@domain.local \ password

Go to the Appliance Settings.

Click Manage

Add Active Directory.

ssgo1

After the AD configuration is completed in PSC , Go to the Single Sign-On – Configuration – Identity Sources.

Click on Add symbol +

Ung

Before adding the AD Domain in PSC it will show the below message .

3led

Select the first option Active Directory ( Integrated Windows Authentication ) and in the Domain Name we can see the AD Domain which we added in the PSC.

Ungg

Next we have to add the appropriate AD Groups and the Users to the roles we want to access the VC.

Go to Global Permissions.

Und

Ungd

Click Add.

Select the AD Domain.

Search the User or Group

Un43

Also if you want to login directly with your domain user without adding the domainname in the username credentials , make the domain as default so it will allow directly AD user without domain name.

aad

Once user is added then try to login in to the webclient using the AD user.

Posted in Platform Services Controller (PSC ), vCSA 6.0, VMware | Tagged , , , , , | 2 Comments