Install and Configure VMware vCSA 6.0 with External Platform Service Controller ( PSC )

Pls check my previous blog about Installing the PSC and Configuring the F5 Load Balancer and in this blog we can see the installation of the vCSA and configuring it with the External PSC.

Before Starting the Installation it is very important to have the DNS configured for the both forward and Reverse for the VC Appliance.

Once we download the ISO , we need to mount it to the local system.

In the root directory we can see the vcsa-setup.html and before proceeding it we need to install the VMware-ClientIntegrationPlugin-6.0.0.exe .

2d

Next screen shows  connecting to target server in which we have to select the ESX host.

itl5ed

Accept the Certificate for the Host.

Next give the Appliance Name.

223d

Next we have to select the type of Platform Service Controller is required for our requirement.

Here we are going with the PSC HA configured using the F5 Load Balancer.

t4led

3d

Next we have to select the Size we are planning to install the appliance.

appl

Next Select the Datastore.

appl_cd

Next Screen to select the Database and we are going with the embedded database.

red

Next we have to select the Network settings for the appliance.

Choose a network : Pls note that it will support the vSwitch or  vDS with ephemeral portgroup , after the deployment it can be moved to a static or dynamic portgroup.

2tled

22tled

Once all set and the installation will start ..

0itled


0itd

Once the installation is done then login to the web client and login .

Pls check my next blog on configuring the AD Authentication with PSC.

Posted in Certificate, High-Availability, Vcenter Appliance, vCSA 6.0, VMware | Tagged , , | Leave a comment

F5 Load Balancer Configuration for the HA Platform Services Controller ( PSC )

Pls check my previous blog on configuring the PSC  in HA and here we can see the F5 configuration for the load balancer.

Node 1: PSCSSO1.domain.local\10.10.10.1

Node2:PSCSSO2.domain.local\10.10.10.2

LB: PSCSSO.domain.local\10.10.10.3

We need to download the lb.p12 file from the ha Folder of one of the PSC Node.

Log in to the F5 BIG-IP configuration Web page.

Click System.

Open File Management, SSL Certificate List.

Click Import.

For Import Type, select PKCS 12.

Provide a descriptive Certificate Name. Browse for the Certificate downloaded earlier. Enter changeme for the Password. Click Import

certifcate

efd

gUntitled_censored

Click Local Traffic.

Open Profiles, SSL, Client.

Click Create.

Provide a descriptive Name.

Click Custom.

Choose the Certificate and Key installed earlier.

Enter the Passphrase for the certificate.

Click Add.

Scroll to the bottom and click Finished.

policys

F51

Untitlfed

Open Profiles, SSL, Server.

Click Create.

Provide a descriptive Name.

Click Custom.

Choose the Certificate and Key installed earlier.

Click Add.

Scroll to the bottom and click Finished.

sslserv

seed

dd

Open Nodes, Node List.

Click Create.

Add all Platform Services Controllers as a node. Use Repeat to speed up the process

nodeed

2ed

Do the same step for the second PSC

ffed

2efd.

Open Pools, Pool List.

Click Create.

Create six pools, one each for port 443, 2012, 2014, 2020, 389, and 636.

All pools have the same Configuration, tcp for monitoring, and Round Robin for Load Balancing Method.

Port-443

ff3ed

Port-2012

Untitleed

Port- 2014

ntitleed

Port-2020

ntleed

Port 636

rled

Port 389

rlged

Open Virtual Servers, Virtual Server List.

oled

Click Create.

All virtual servers—except the one for port 443—have the same configuration.

Provide a descriptive Name.

Enter the Destination Address.

For Service Port, enter 443.

For SSL Profile (Client), select the client profile created earlier.

For SSL Profile (Server), select the client profile created earlier.

For Source Address Translation, select Auto Map.

For the Default Pool, select the pool created for port 443.

For the Default Persistence Profile, select source_addr.

Click Finished.

pd

od

d3

All other ports: 2012, 2014, 2020, 389, and 636. All settings are the same, except there is no SSL Profile (Client) or SSL Profile (Server) and the Service Port and Default Pool should match. For example, if the Service Port is 2012, the Default Pool should be the pool set up for port 2012.

e5d

itled

Open Profiles, Persistence.

Click source_addr.

Check Match Across Services and click Update

e0d

After both Platform Services Controller nodes have been installed and configured, click Network Map and verify that all services are up (green).

Once the configuration is done then check the PSC load balancer by bringing down the active PSC node to make sure the traffic is routing to the another PSC Node.

In case if we are not going with any load-balancer then pls check the below link to automate the PSC Fail-over using the script

http://www.virtuallyghetto.com/2015/12/how-to-automatically-repoint-failover-vcsa-to-another-replicated-platform-services-controller-psc.html

Also I have written the Powershell Script to repoint the VC to the another replication partner PSC and download the script from the blog.

Reference :

Click to access vmware-vcenter-server6-deployment-guide.pdf

http://kb.vmware.com/selfservice/search.do?cmd=displayKC&docType=kc&docTypeID=DT_KB_1_1&externalId=2116281

http://kb.vmware.com/selfservice/search.do?cmd=displayKC&docType=kc&docTypeID=DT_KB_1_1&externalId=2112736

Posted in Certificate, High-Availability, Platform Services Controller (PSC ), Vcenter Appliance, vCSA 6.0, VMware | Tagged , , , , | 2 Comments

Invalid Credentials: Issue with connecting VC6 to an external VMware PSC High Availability deployment.

After finishing the load balancer F5 configuration for the external PSC , I tried to install the VCenter Appliance to connect the external PSC. When I provided the external PSC credentials to the LB FQDN\IP it was throwing the error as ” INVALID CREDENTIALS ” whereas the same credentials is working fine with the main PSC Node 1 and Node 2.

By using the below blogs , I try to fix the issue by checking the DNS and the certificate but nothing helped and also I tried with the fresh install of the PSC with the new F5 LB configuration but yet I was stuck with the same issue.

Since the credentials was working fine with the main PSC , I was suspecting the issue with the F5 configuration and at last I found that while configuring the Virtual Servers I missed the Source Address Translation to select as Auto Map to all the ports mentioned in the VMware and just selected it for only port 443.

lesd

It was also not mentioned clearly in the VMware document so it is important to select the Source Address Translation to Auto Map to all the ports as same as port 443.

Reference:

http://snowvm.com/2015/07/23/issue-with-an-external-vmware-psc-high-availability-deployment/

Posted in Platform Services Controller (PSC ), Vcenter Appliance, vCSA 6.0, VMware | Tagged , , | Leave a comment

Trend Micro Deep Security 9.5 ( Event Based Tasks to activate New AD Computer Object) – Part 16

Pls check my previous blogs for the DSM , Relay Server , vShield End Point , Filter Driver,DSVA, DSA , SSP Server , Policies and Exclusions , Events and Monitoring , VMtools and VDI Environment with Agent Protection and Agentless Protection ,Trend DPM Service Pack and Relay Server Upgrdae and Trend Filter Driver and Deep Security Virtual Appliance .In this blog we can see the how to activate the agent using the Event-Based Tasks for the Active-Directory Computer Object.

In Agent-based environment for any newly created computer we have to activate the agent manually or using any thrid-party option like running SCCM or Script but if we have AD integration with DSM we can make the activation using the EVENT-BASED Tasks option in Trend DSM.

It will be very useful for the Non-VMware based VDI environment.

To address this issue, I suggest to upgrade to the below patch release and make sure to take the DB backup before upgrading the patch.

DS 9.5 SP1 Patch 1 Binaries:

Windows:
http://files.trendmicro.com/products/deepsecurity/en/9.5/Manager-Windows-9.5.6008.x64.exe

Linux:
RedHat 6
http://files.trendmicro.com/products/deepsecurity/en/9.5/Manager-Linux-9.5.6008.x64.sh

RedHat 5
http://files.trendmicro.com/products/deepsecurity/en/9.5/Manager-Linux-9.5.6008.x64.sh

Go to the Administration – Event-Based Tasks

w2

Click New- select Computer created ( System )

ledd

Give some time after the new system is created in the AD OU because it will take time to power-on .

245Untitled

Active-Directory OU structure.

nsored


Select the Folder Name and point the OU Name.

3tled

If you want to activate any specific computer name then create one more rule for the computerName.

Unftitled

Make Sure to enable the same.


Untitlted

Make sure to have the Scheduled Task for the Daily Synchronize Directory for one hr so that all the folders in the Trend DSM AD OU will SYNC with AD and update the same.

If we manually SYNC the AD then the Event-Based tasks will fail to activate the agent because as per the rule , new computer have to be updated using the system so wait to finish the AD Sync to finish as per the schedule.

Untled

Posted in Trend Micro Deep Security | Tagged , , , , , | Leave a comment

Upgrade the Certificate Authority to SHA256

VMware recommends the certificate authorities to generate certificate using SHA256 and also in SSO LB document they mentioned not to use SHA 1 signature algorithm for SSL certificate. Pls find the below steps to upgrade the CA to SHA256.

Before doing any changes to the CA take the backup of the CA repository and SUB CAs

Certuil -backup \\share\backup

Certuil -backup \\Share\subbackup

CA


Upgrade Certification Authority to SHA256

Open the Windows Powershell.

Enter the command:

certutil -setreg ca\csp\CNGHashAlgorithm SHA256

22CA (2)


Restart the service.

ca1


After the change CA will issue now SHA256 as Hash Algorithm and also we can renew CA to use SHA256.

CA22caedcaed1cad


cadd


Reference :

https://blogs.technet.microsoft.com/heyscriptingguy/2016/02/18/migrate-windows-ca-from-csp-to-ksp-and-from-sha-1-to-sha-256-part-4/?wt.mc_id=WW_CE_WS_OO_SCL_TW&Ocid=C+E%20Social%20FY16_Social_TW_windowsserver_20160220_372280964

http://blogs.technet.com/b/askds/archive/2015/10/26/sha1-key-migration-to-sha256-for-a-two-tier-pki-hierarchy.aspx


Posted in Certificate, Windows | Tagged , , , | Leave a comment

How to find which VMDK is associated with which disk in Windows Server.

1. Login to the client and edit the VM .

2. Select the Hardisk and note the SCSI ( 0:X )

hdd

3. Login to the windows Guest VM – Go to the Disk-Management.

disk2

4. Right click the Disk and Go to the proprieties.

hdd1

We can notice the Target ID X with the same number as the SCSI ID SCSI ( 0:X )

Check the other blog to identify host , datastore and vCenter of the running VM .

How to identify host , datastore and vCenter of the running VM .


Posted in ESX command, VMware, Windows | Tagged , , | 1 Comment

Trend Micro Deep Security 9.5 ( Deploying Agentless Protection in an NSX Environment.) – Part 15

Pls check my previous blogs for the DSM , Relay Server , vShield End Point , Filter Driver,DSVA, DSA , SSP Server , Policies and Exclusions , Events and Monitoring , VMtools and VDI Environment with Agent Protection and Agentless Protection ,Trend DPM Service Pack and Relay Server Upgrdae and Trend Filter Driver and Deep Security Virtual Appliance .In this blog we can see the Agentless protection in an NSX-V Environment.

Before going in to the topic, pls check my other blogs also on the implementation of the NSX Manager 6.1.4 so that you can get more information on the same.

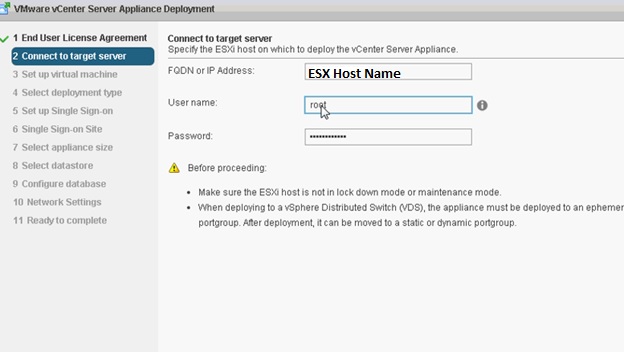
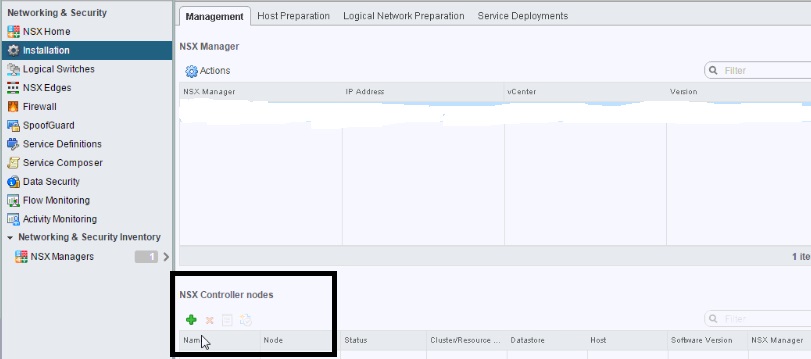
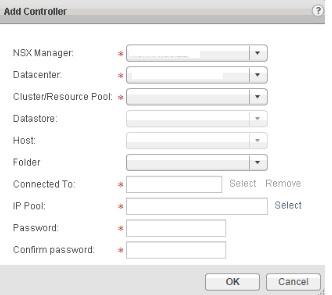
First add the vCenter to the DSM and when it prompt for the vShield or NSX Manager , provide the NSX Manager details.

1led

Preparing ESXi Servers

Before the Deep Security Virtual Appliance service can be deployed to your datacenter, your ESXi servers must first be prepared by installing the drivers necessary for network traffic inspection. This operation is performed on the cluster.Pls check my blog preparing the cluster and host for more info.

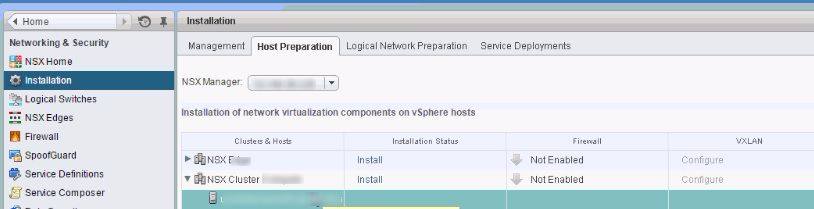
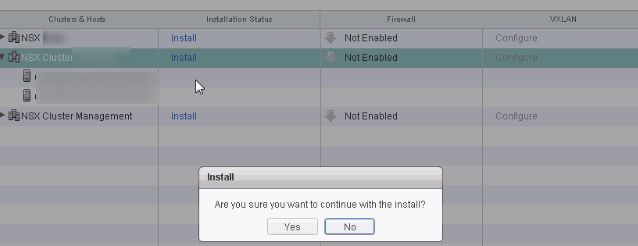
Login to the web client  Home – Networking and Security – Installation – Click Host preparation.

Un05titled

Pls check my blog for more details on the installation steps.

Installing the Guest Introspection Service.

Once the Host Preparation is done then the next step is to install the Guest Introspection Service.

To protect the VMs with Deep Security , We have to install the Guest Introspection Service on the cluster that contains the ESXi Servers.

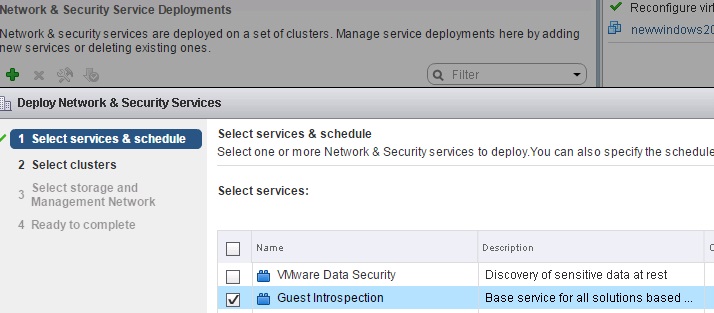
Go to Home – Networking & Security – Installation – Service Deployment and click +

Select Service & Schedule – Select Guest Introspection:
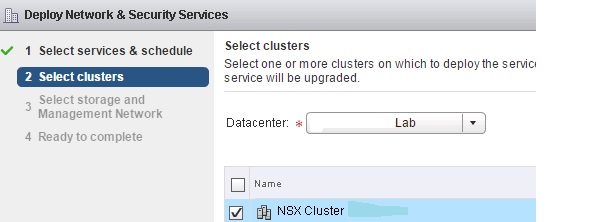
pic1


Select the Cluster

pic3


Choose the Storage and Network

pic4


Click Finish.

pic5


Creating the NSX Security Groups:

VM must be organized into a NSX Security Group before a vSphere policy is assigned to them.

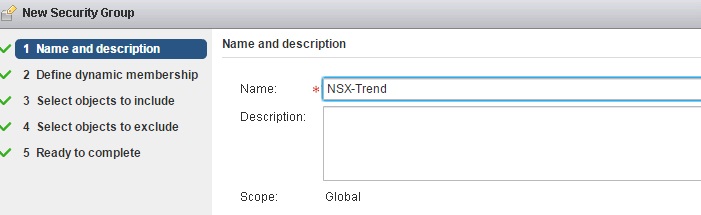
Go to the Security Groups – Home – Networking & Security – Service Composer and click the New Security Group icon.

pic6

Give the name to the security Group.

pic7

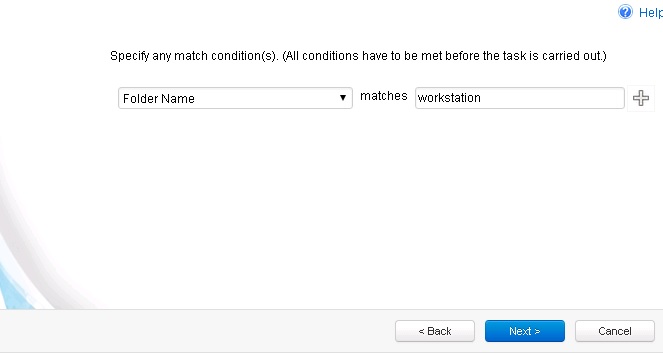
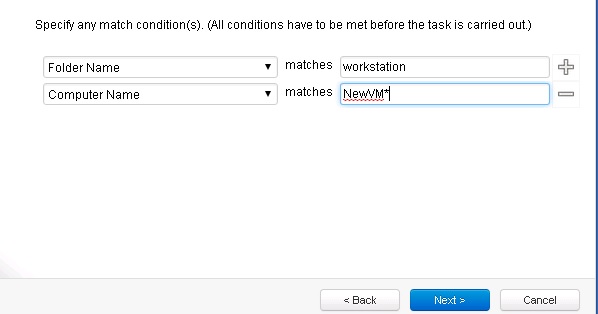
Define Dynamic Membership: If you wish to restrict membership in this group based on certain filtering criteria, enter those criteria here

pic9

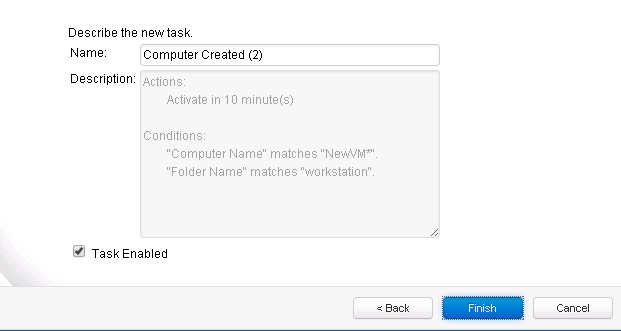
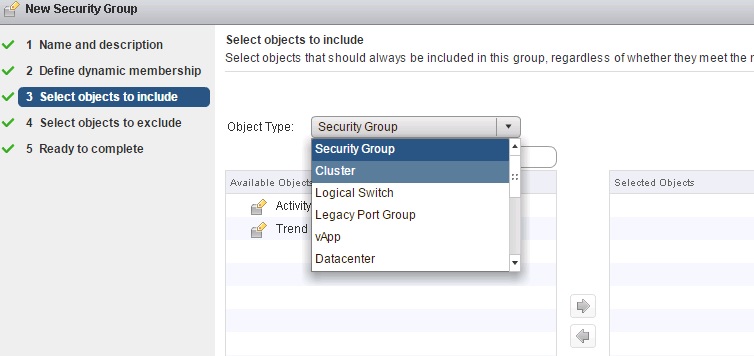
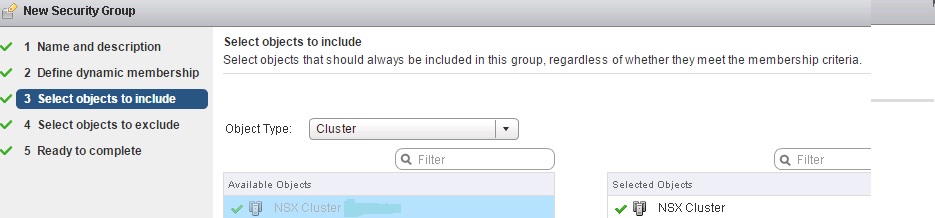
There are many ways to include or exclude objects in a NSX Security Group, but for this example, we will simply include the NSX cluster that contains the hosts and VMs that we want to protect. In the Select objects to include options, select Cluster from the Object Type menu, and move the NSX Cluster that contains the VMs to protect to the Selected Objects column.

pic10

pic11

Click Finish to create the new security group.

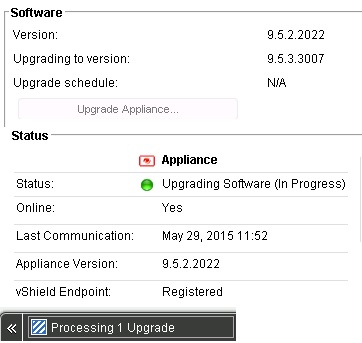
Install the Deep Security Service.

To provide agentless protection to the virtual machines on your ESXi servers, you must install the Deep Security service (the Deep Security Virtual Appliance) on your ESXi servers

Login to the web-client Home – Networking and Security – Installation – Service Deployments and click +

jled

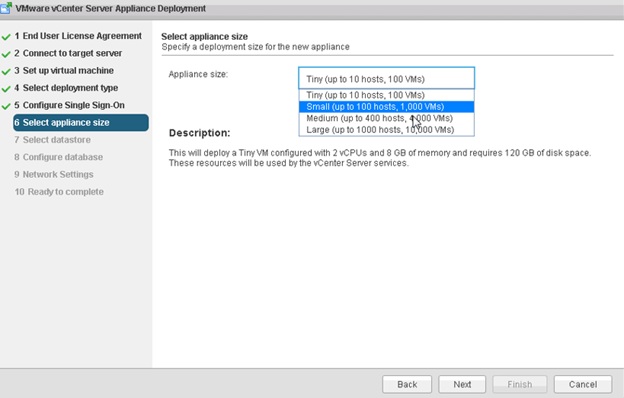
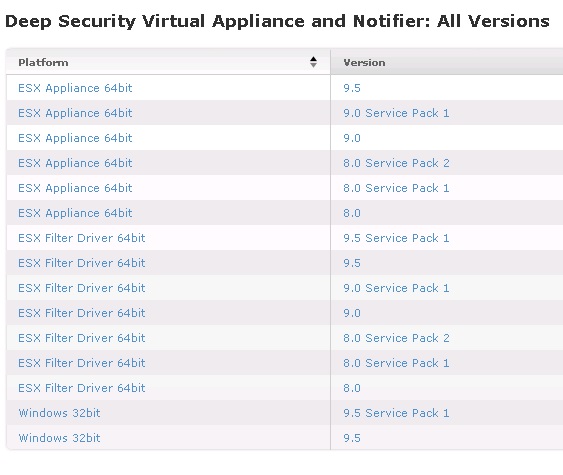
Select Services & Schedule : Select the Trend Micro Deep Security service:

pic15


Select the cluster

pic13


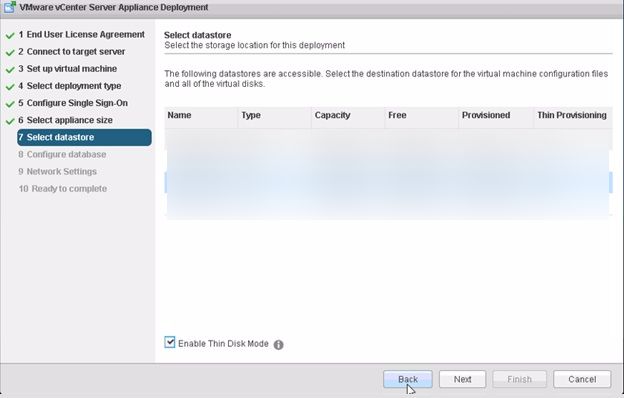
Select Storage and Network:

pic14

Click Next and Finish to complete.

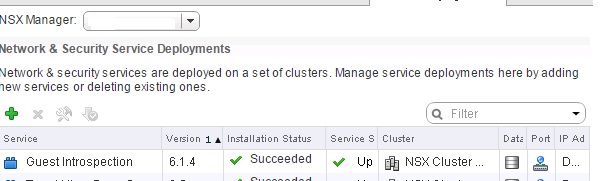
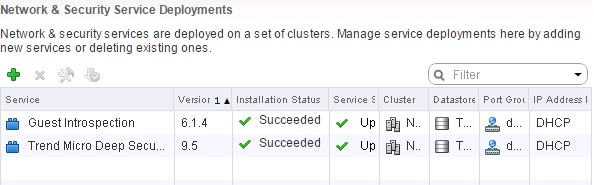
Once the deployment is completed , we will see the Deep Security Service in the list of Network & Security Service Deployment.

pic16

Create an NSX Security Policy:

Now we have to create the NSX Security Policy with Deep Security enabled as both an Endpoint Service and as a Network Introspection Service.

Go to Home – Networking and Security – Service Composer and Click on the Security Policies – Click New Security Policy.

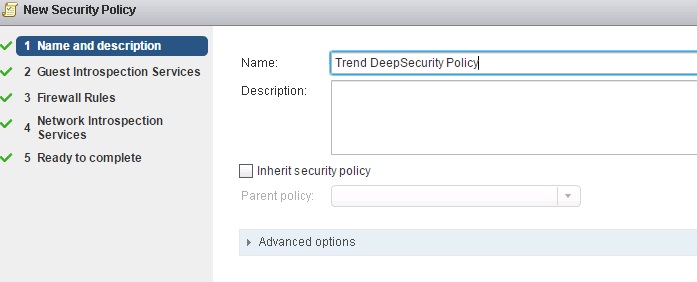
Name and Description: give a name to the new policy:

pic116

Guest Introspection Services : Click add to add an Enpoint Service and provide the name for the Endpoint Service.

pic17

Click Next and in Firewall Rules do make any changes .

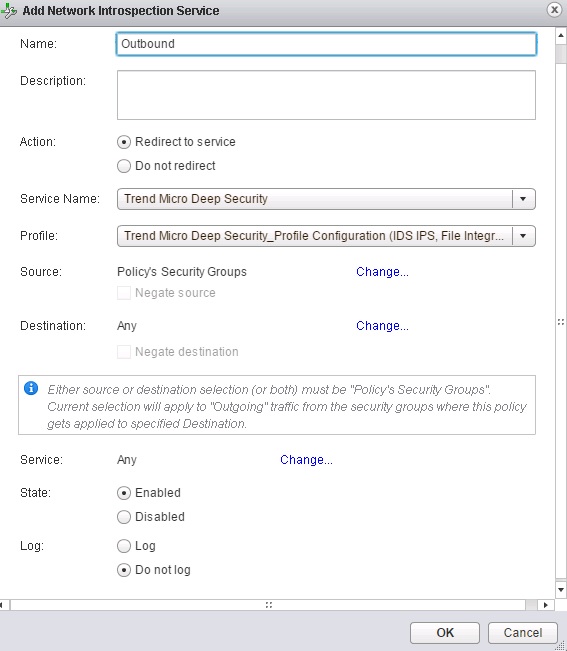
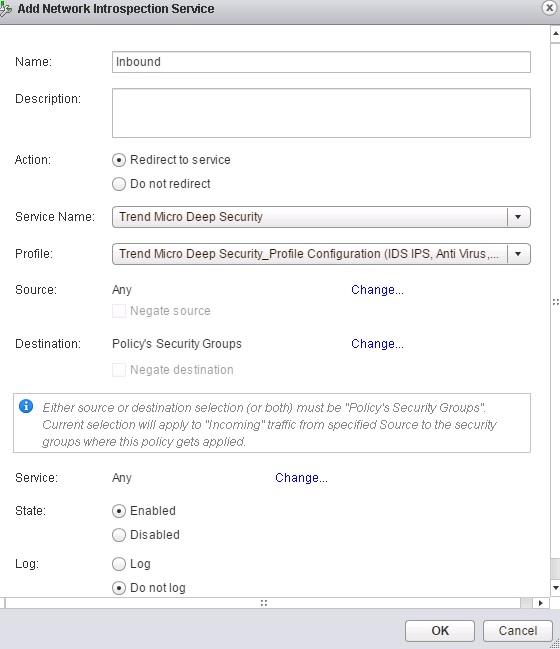
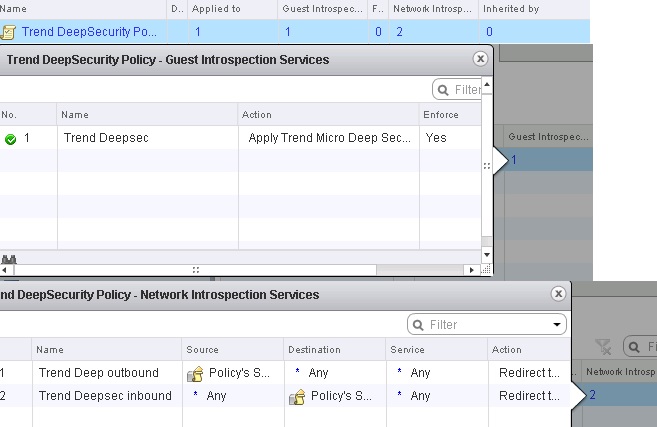
Network Introspection Service :

We need to add two Network Introspection Services to the Network Security Policy : Outbound \Inbound Traffic.

pic18    pic 19

pic20


Once done click finish and now we have created the NSX Security Policy for Deep Security.

Apply the NSX Security Policy to the NSX Security Group

Go to Home – Networking & Security – Service Composer – select the newly created policy and click Apply the Security Policy icon.

pic21

The NSX Security Policy is now applied to the VMs in the NSX Security Group.

Adding Additional ESXi Servers to Your NSX Cluster After Deep Security Integration

Adding a new ESXi server to a NSX cluster that is protected by Deep Security must be done in the following sequence:

1. Add Host to the DataCenter but not directly to the cluster.

2. Connect the Host to the Distributed Switch.

3. Move the Host into the cluster. Once the Host is moved into the cluster, the Deep Security service will be deployed automatically.

Apply Deep Security Protection to Your VMs

Apply the Policy and also install the vShield Driver on the VMs and activate the same , Pls see my previous blogs on the same.

pic22

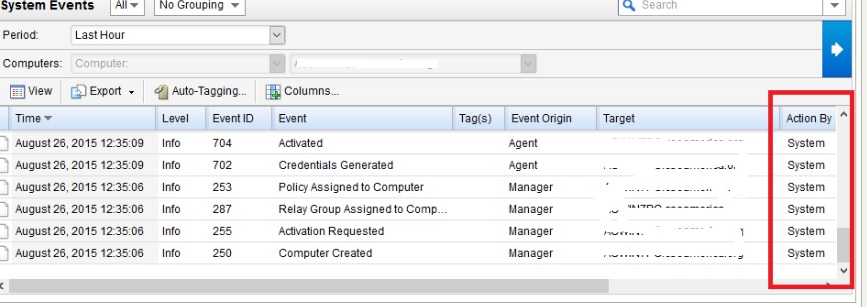
Tested the web url and also with Test Virus , result is below..

pic23 pic24


Posted in Trend Micro Deep Security | Tagged , , , | Leave a comment

Preparing the Cluster and Host ( NSX 6.1.4 ) – Part 4

Pls check my previous blog for the Installation , Configuration and Controller Deployment of the NSX 6.1.4 and now we can see how to prepare the esx host and cluster for NSX.

Cluster Installation 

We need to install the NSX bits on all the hosts in the cluster. In the web client go to the Networking & Security – Installation – Host Preparation.

Untitled_censored

Select the Cluster and click install .

11Untitled

Untitled4

We can see the installation in the recent tasks and the important without putting the ESX in Maintenance Mode the installation will be completed .

1Untitlejdd


Un5titled


In the above PIC we can see the firewall status was unknown which is common and once the process is completed then  we can verify the status of the firewall as enabled.

Un05titled


Posted in NSX 6.1.4, VMware | Tagged , | Leave a comment

Deploying NSX Controllers ( NSX 6.1.4 ) – Part 3

Pls check my previous blog for the Installation and configuration of the NSX 6.1.4 Manager and here we can see the NSX Controllers deployment.

NSX Controllers is deployed using the NSX Manager for managing the control plane activities and it is recommended to have it in odd number so that if one controller down then more nodes can function as a cluster.

Adding a Controller.

Go to Networking $ Security > Installation

Click the add button to create a new cluster.

121d

1ed

NSX Manager – Name or IP of the NSX Manager Server.

Datacenter – DC in which NSX Controller placed.

Cluster\Resource Pool – Cluster or resource pool which NSX Controller placed.

Datastore – Datastore which NSX Controller installed.

Host – Host in which we want to have the NSX Controller or we can leave it blank.

Connect To – Port Group which NSX Controller will use to communicate.

IP Pool –  IP Pools are used for assigning IP address to controllers and VTEPs and it will take the IPs from the pool and release them back when it has been removed.

Name – Name of the Pool

Gateway – Default Gateway for the subnet.

Prefix Length – Subnet masks binary length

Primary / Secoundary DNS – DNS Server but it is not the must one..

DNS Suffix – Suffix name of the domain .

Static IP Pool – List of IP address being assigned to the pool.

1ded

Password – Admin Password on the controller guest vm.

Once done the configuration we will notify the new VM deployed .

d_censored (1)


Posted in NSX 6.1.4, VMware | Tagged , , | Leave a comment

Trend Micro Deep Security 9.5 ( Filter Driver and Deep Security Virtual Appliance – DSVA Upgrade ) – Part 14

Pls check my previous blogs for the DSM , Relay Server , vShield End Point , Filter Driver,DSVA, DSA , SSP Server , Policies and Exclusions , Events and Monitoring , VMtools and VDI Environment with Agent Protection and Agentless Protection ,Trend DPM Service Pack and Relay Server Upgrdae.

Update:2\27\2016

Check the blog to install the filter driver on ESX5.x under Trend DSM 6.0 SP1

In this blog we can see the Trend Filter Driver and Deep Security Virtual Appliance – DSVA Upgrade.

Download the updated Filter Driver from the below link.

http://downloadcenter.trendmicro.com/index.php?regs=NABU&clk=result_page&clkval=drop_list&prodid=1081

dsvau1

In the DSM Console – Go to Administration > Updates > Software > Local

dsvau2

Click Import

dsvau3

Browse to the location where the Filter Driver was downloaded to and select the same.

dsvau4

Click Next

dsvau5

Click Finish and Close.

dsvau6


We can see the newly imported Filter Driver available in the Local Software.

dsvau7

Updating the ESX Hosts with the updated Filter Driver.

Once uploading the Filter Driver , we can notice the ESX hosts will show a status of “Upgrade Recommended ”

dsva8u

To Upgrade the ESX Hosts – Select the Hosts – Right Click – Select Actions – Upgrade Filter Driver.

dsvau9

Click Next.

dsvau10

dsvau11

ESX will be put in to Maintenance Mode.

dsvau12

Close when finished.

To upgrade the DSVA, it is a similar process.  Right-Click on the DSVA(s) you wish to upgrade > Select Actions > Upgrade Appliance

dsvau13

dsvau14

dsvau15


Once done we can see the updated version of the DSVA.

Related Links:

Trend Micro Deep Security Manager 9.6 – Installing the filter driver on ESX5.1 – Part 3


Posted in Trend Micro Deep Security | Tagged , , , | 1 Comment